|
|
Comments: This is the first of two uses of Obverse 3 and fourth and final use of Reverse A in 1842. Reverse A is transitional, later used to strike die marriage OC-1 in 1843. |
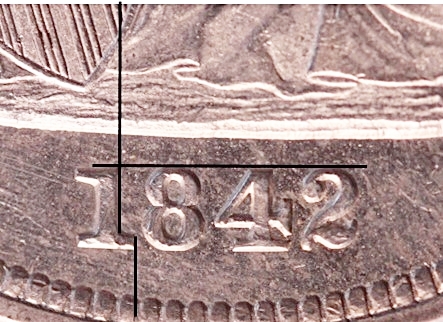
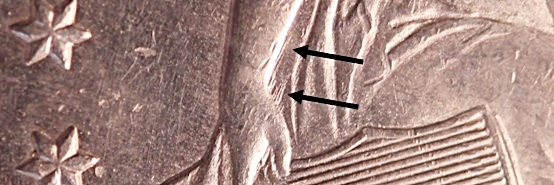
Obverse 3 The photo below shows the Obverse 3 attribution grid. Obverse 3 exhibits die lines that parallel the left arm above the thumb, shown in the second photo. These die lines make attribution relatively easy for any examples VF or better.  1842 Obverse 3 attribution grid  1842 Obverse 3 die lines above the left thumb
|
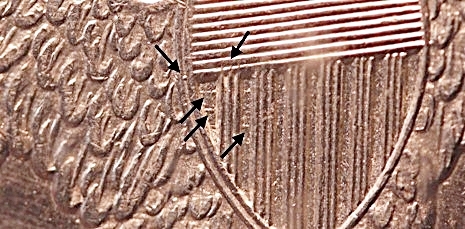
Reverse A Reverse A displays several notable die lines in the upper left shield recesses. These are pictured in the photo below.  1842 Reverse A die lines in shield recesses
|
