
|
|
Comments: This is the second and final use of Obverse 3 and first of four uses of Reverse B. |
Obverse 3 The photo below shows the Obverse 3 attribution grid. Obverse 3 exhibits die lines that parallel the left arm above the thumb, shown in the second photo. These die lines make attribution relatively easy for any examples VF or better. 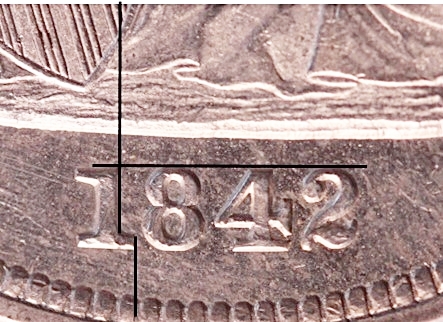 1842 Obverse 3 attribution grid 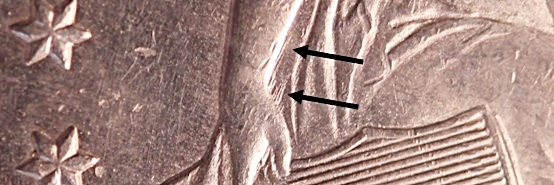 1842 Obverse 3 die lines above the left thumb
|
Reverse B Reverse B is very different from Reverse A. There are no die lines in the shield recesses. The best markers are the extensions of the vertical shield lines downward into the shield border, visible even on low-grade coins. Additional markers are several upward extensions of the vertical shield lines into the horizontal lines. These are notable on high-grade coins, but not nearly as reliable a marker as the lower extensions. 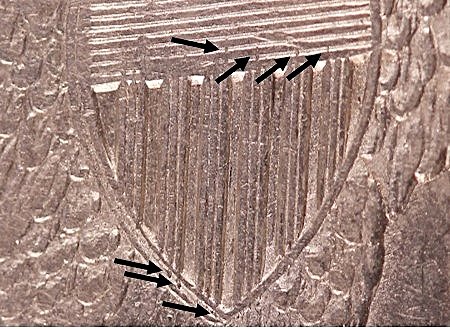 1842 Reverse B die markers
|
| Photo credits:
Obverse 3: 1842 PCGS MS62 CAC, from the Osburn-Cushing reference collection. Reverse B: NGC AU55, from the Osburn-Cushing reference collection. |