
|
|
Comments: This is the third and final use of Obverse 1 and the only use of Reverse B. |
Obverse 1 The photo below shows the Obverse 1 attribution grid. 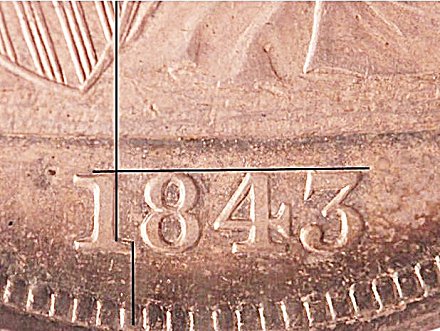 1843 Obverse 1 Attribution Grid The 4 exhibits minor repunching under the crossbar, seen in the photo below. This diagnostic can be seen even on late die states.  1843 Obverse 1 Repunched 4
OC-3 has been found only with obverse die state d. |
Reverse B 1843 Reverse B features light haywire die lines in upper shield recesses 1, 2, and 3. The die lines are similar to those seen on Reverse A, but run in random directions. Most notable is the line just under the horizontal shield lines. This line crosses the first three shield recesses. Die lines also run slightly up to the left just under the left wing, and up to the left into the field from the left side of the eagle’s neck. It may be difficult to see some of these markers on lower grade coins. 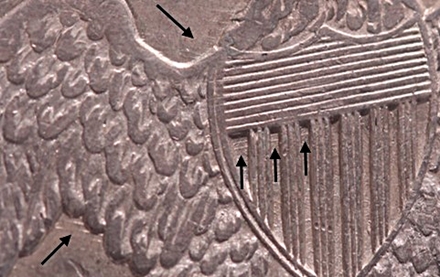 Reverse B Die Lines
No later die states have been observed. |
| Photo credits:
Obverse 1: 1843 NGC MS61, from the Osburn-Cushing reference collection. Obverse 1 repunched 4: 1843 PCGS AU55, from the Osburn-Cushing reference collection. Obverse 1 rim cud: 1843 PCGS VF30, from the Osburn-Cushing reference collection. Reverse B: 1843 NGC AU58, from the Osburn-Cushing reference collection. |