
|
|
Comments: This is the only use of Obverse 3 and the only use of Reverse D. |
Obverse 3 The following photo shows the Obverse 3 attribution grid. 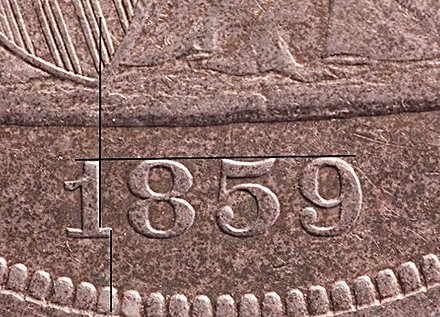 1859 Obverse 3 attribution grid Obverse 3 exhibits several light die lines crossing the legs. These are shown in the next photo. Note that the line shown near the bottom of the photo is a scratch on the pictured coin, not a die marker. 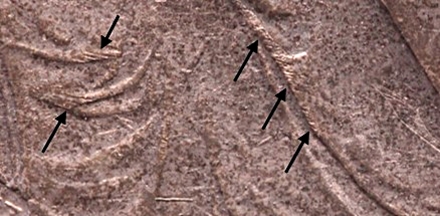 1859 Obverse 3 die lines across gown and legs
|
Reverse D displays no notable die markers. The easiest identification point is the LACK of an extension of horizontal shield line #1 across the left border. This differentiates this die from the other 1859 reverses, all of which show some extension of horizontal shield line #1 to the left. 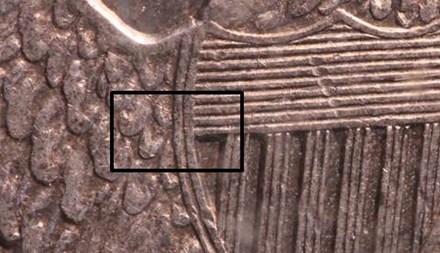 1859 Reverse D No shield line extensions
|
| Photo credits:
Obverse 3 and Reverse D: 1859 PCGS Secure XF45, from the Osburn-Cushing reference collection. |