
|
|
Comments: This is the only use of Obverse 2 and the only use of Reverse B. |
Obverse 2 The photo below shows the Obverse 2 attribution grid. 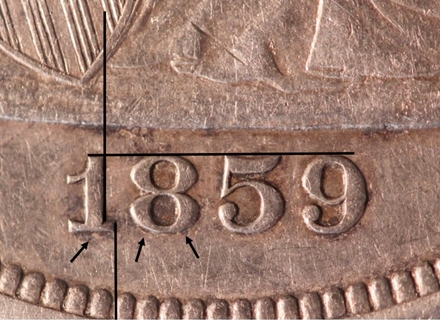 1859-S Obverse 2 attribution grid Obverse 2 shows no notable die markers, but the date position is sufficient different from Obverse 1 to allow positive attribution. Early die states show significant repunching on 18 (see the arrows in the photo above), but Obverse 1 shows very similar repunching, so this isn’t a good marker to use for attribution.
|
The photo below shows the mintmark position for Reverse B. Note that the Reverse B mintmark position is virtually identical to that of Reverse A, and it shows no notable markers. The obverse date position should be used to attribute the die marriage. 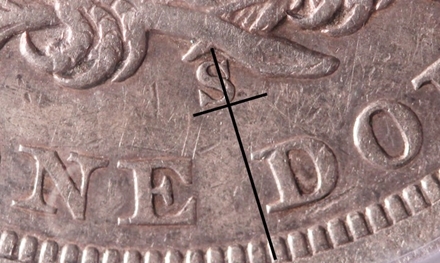 1859-S Reverse B mintmark
|
| Photo credits:
Obverse 2 and Reverse B: 1859-S PCGS XF45, from the Osburn-Cushing reference collection. |