
|
|
Comments: This is the fourth of 5 uses of Obverse 2 and the first of two uses of Reverse C. |
Obverse 2 The photo below shows the Obverse 2 attribution grid. 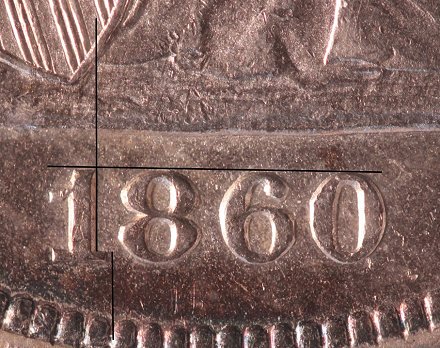 1860-O Obverse 2 attribution grid Obverse 2 exhibits minor repunching on the date, visible above the 8 and 0 and inside the upper loops of the 8 and 6. Die polish lines extend into the field from the rock above 60, almost horizontal, slanting slightly down to the left. All these markers were removed by die polishing prior to the use of Obverse 2 to strike OC-5 examples. The marker that remains after die polishing and is visible on all usages of Obverse 2 is a circular mark on Miss Liberty’s gown below the left breast. This is indicated by the arrow in the following photo. This die line is shallow, but visible on most coins in AU or better. It may be difficult to see if the coin is heavily bag-marked or has excessive contact marks. It’s often difficult to see in photos. I've enhanced the die line on the photo below to aid in attribution. 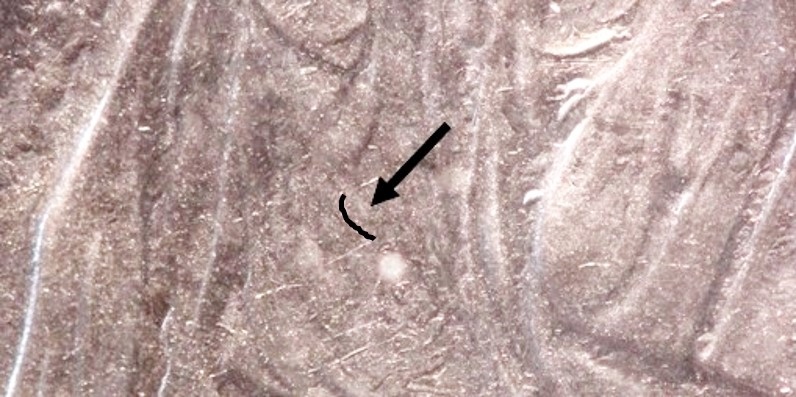 1860-O Obverse 2 circular die line For simplicity, the date position should be considered as the best feature to attribute this obverse. It's unique enough to separate it from the other 1860-O obverse dies.
|
The photo below shows the mintmark position for Reverse C.  Reverse 1860-O C mintmark The Reverse C mintmark position is farthest left of any for the year. Additional markers are notable die lines in shield recesses 1, 4, 5, and 6. The most visible are those in recesses 4 and 5. 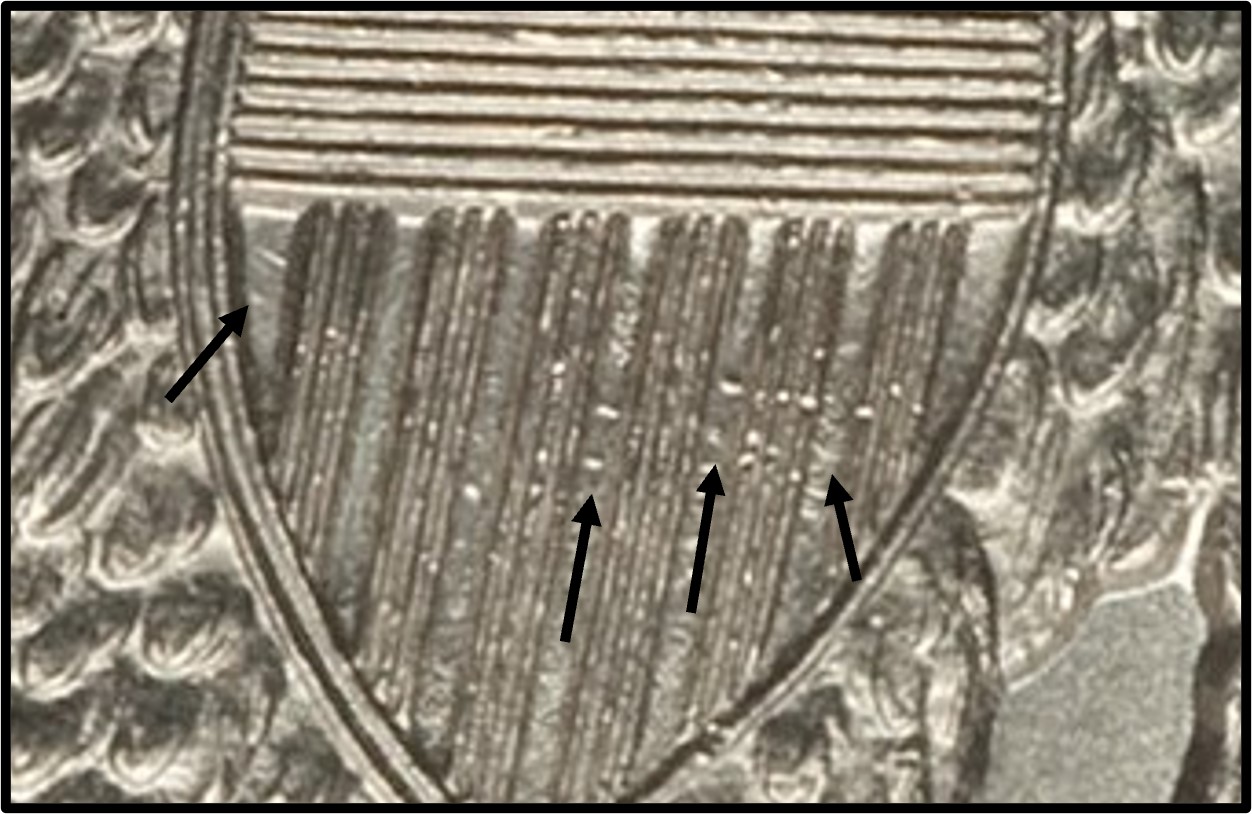 1860-O Reverse C die markers in shield recesses
 1860-O Reverse C - State b die crack No later die states have been found. OC-5 is found with both reverse die states. Most examples I’ve examined are reverse state b. Early die states without the die crack seem to be quite rare. |
| Photo credits:
Obverse 2: 1860-O NGC MS60, from the Osburn-Cushing reference collection. Reverse C: 1860-O PCGS MS61, from the Osburn-Cushing reference collection. |