
|
|
Comments: This is the first of two uses of Obverse 3 and the first of two uses of Reverse D. |
Obverse 3 The photo below shows the Obverse 3 attribution grid.  1860-O Obverse 3 attribution grid Although Obervse 3 displays no notable markers the date position is sufficient for attribution. The date is farther right than any other for the year, and is the only date for the year with a 0 that's slightly low in the field.
|
The photo below shows the mintmark position for Reverse D. 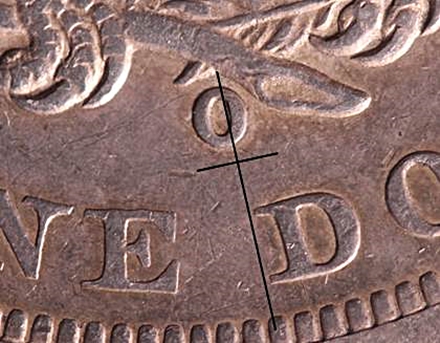 1860-O Reverse D mintmark Reverse D displays no notable markers other than the mintmark position. This mintmark position is unique, highest of any for the year and centered very slightly left of directly under the intersection of the branch and feather tip.
|
| Photo credits:
Obverse 3 and Reverse D: 1860-O PCGS AU50, from the Osburn-Cushing reference collection. |