
|
|
Comments: This is the second and final use of Obverse 4 and the second and final use of Reverse C. |
Obverse 4 The photo below shows the Obverse 4 attribution grid. 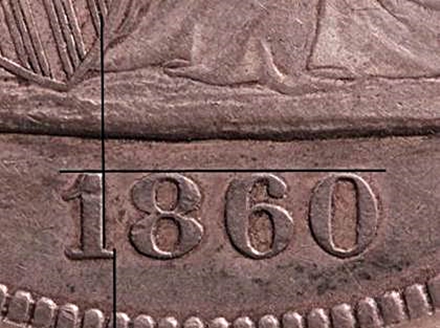 1860-O Obverse 4 attribution grid Obverse 4 also features a tine extending from the top of the left end of the scroll, shown in the following photo. This tine is the result of a die crack. The crack occurred very early. I've seen very few examples of this obverse die without it, so it's a good marker to look for, but not conclusive. 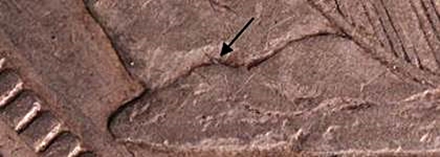 1860-O Obverse 4 tine off top of ribbon end
|
The photo below shows the mintmark position for Reverse C.  Reverse 1860-O C mintmark The Reverse C mintmark position is farthest left of any for the year. Additional markers are notable die lines in shield recesses 1, 4, 5, and 6. The most visible are those in recesses 4 and 5. 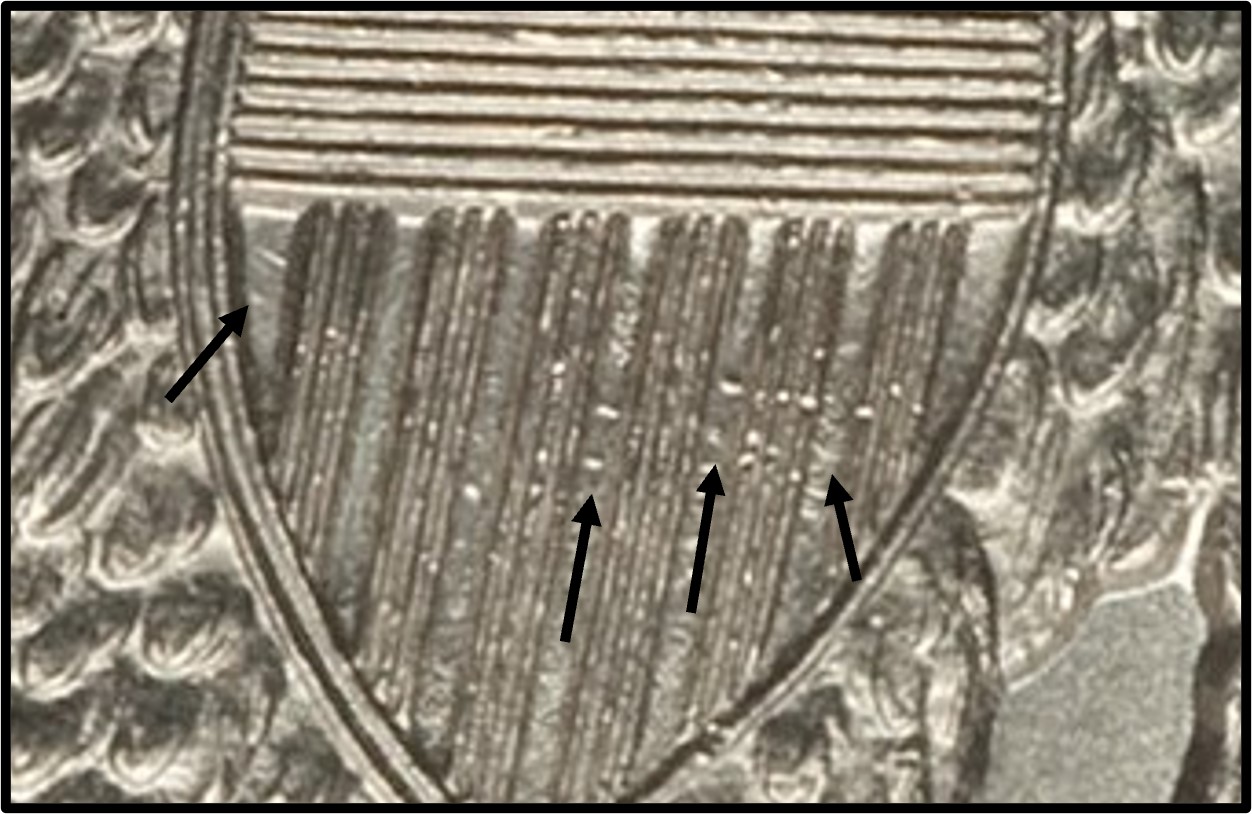 1860-O Reverse C die markers in shield recesses
 1860-O Reverse C - State b die crack No later die states have been found. OC-9 is found only with reverse die state b. |
| Photo credits:
Obverse 4: 1860-O PCGS XF40, from the Osburn-Cushing reference collection. Reverse C: 1860-O PCGS MS61, from the Osburn-Cushing reference collection. |