
|
|
Comments: This is the only use of Obverse 3 and the only use of Reverse C. |
Obverse 3 The photo below shows the Obverse 3 attribution grid. 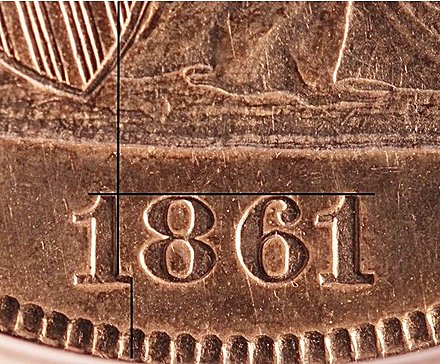 1861 Obverse 3 attribution grid Obverse 3 also displays a heavy die line in the denticles above the head that can be used as a die marker. This feature is shown in the following photo. 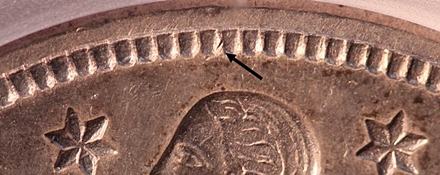 1861 Obverse 3 die line above head
|
Reverse C displays no notable die markers.
|
| Photo credits:
Obverse 3 and Reverse C: 1861 ICG AU55, from the Osburn-Cushing reference collection. |