
|
|
Comments: This is the only use of Obverse 1 and the only use of Reverse A. |
Obverse 1 Obverse 1 is the only 1865 die with the 1 located slightly low in the field. The photo below shows Obverse 1 attribution grid. 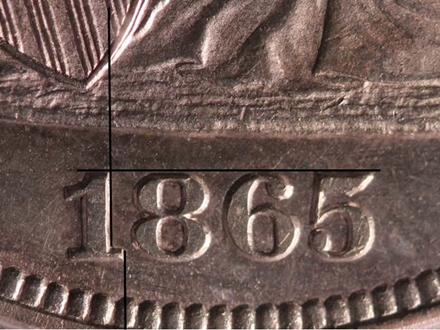 1865 Obverse 1 attribution grid An additional marker is a tiny die chip connected to Miss Liberty’s toe, shown below. Very slight die doubling is also visible on the hem of Miss Liberty's gown. 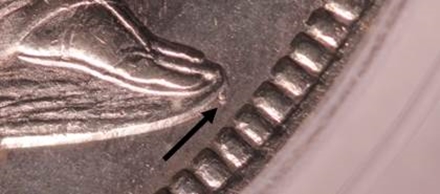 1865 Obverse 1 die chip off toe
|
Reverse A displays one notable die marker that allows easy attribution. The U in UNITED is sharply doubled. This one is difficult to explain. It can’t be a doubled die, since all the details were in the hub, and only the U is doubled. And with the details in the hub we know of no reason that the mint would have had a U punch on hand. We’ll leave it to the error experts to explain it. It’s shown in the following photo. 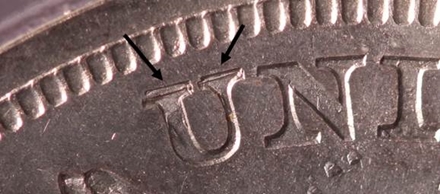 1865 Reverse A repunched U
|
| Photo credits:
Obverse 1 and Reverse A: 1865 PCGS MS details, cleaned, from the Osburn-Cushing reference collection. |