
|
|
Comments: This is the only use of Obverse 6 and the second of four uses of Reverse B (including one re-marriage). |
Obverse 6 The photo below shows the Obverse 6 attribution grid. 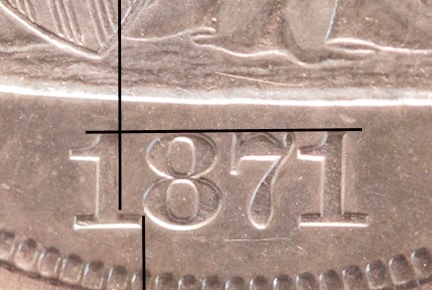 1871 Obverse 6 attribution grid Obverse 6 exhibits several die markers visible on mid- to high-grade coins. A large die lump is seen on the gown just right of the bottom of the Y in LIBERTY. Additional die lumps are visible between the legs. The following photos show these features: 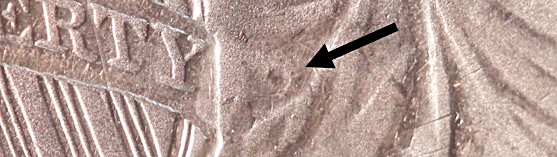 1871 Obverse 6 die lump right of Y 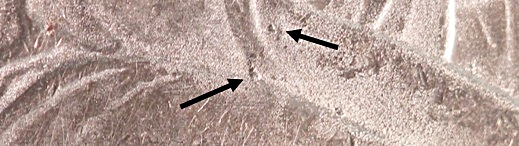 1871 Obverse 6 die lump between legs
|
1871 Reverse B features two notable die lines, pictured in the next two photos, that allow quick identification of mid- to high-grade examples. Note that these die lines are much weaker on state c of the reverse due to die polish. 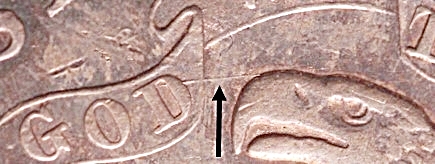 1871 Reverse B die line near eagle's beak 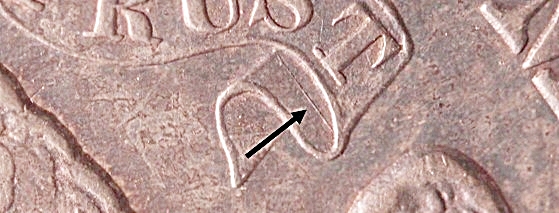 1871 Reverse B die line in fold under TRUST
|
| Photo credits:
Obverse 6: 1871 NGC MS61, from the Osburn-Cushing reference collection. Reverse B: 1871 NGC AU55, from the Osburn-Cushing reference collection. |