
|
|
Comments: This is the only use of Obverse P1 and the first of two uses of Reverse PA. |
Obverse P1 The photo below shows the Obverse P1 attribution grid. Two tiny lumps in shield recess #4 can be used as additional die markers. They are shown in the second photo. 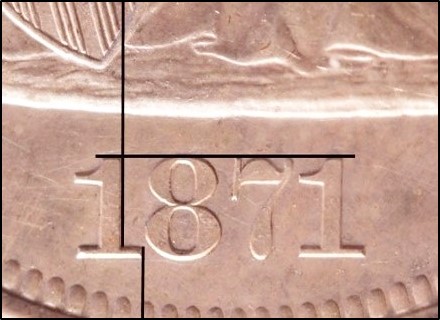 1871 Obverse P1 attribution grid 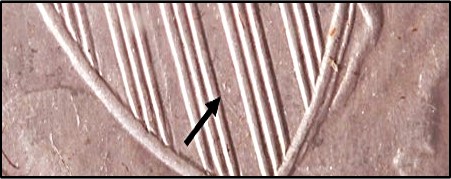 1871 Obverse P1 lumps in shield recess #4
|
1871 Reverse PA features several minor die markers. A tiny die line extends from the left wing toward the notch between the upper two leaves (note that the upper line on the photo is a die polish line on the coin pictured, NOT a die marker). A short circular die line is visible near the top of the scroll right of the E in WE. Scribe lines are visible under the denticles above ED and above ST. These are shown on the following photos. 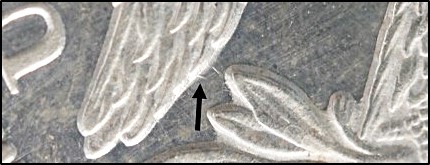 1871 Reverse PA die line from left wing 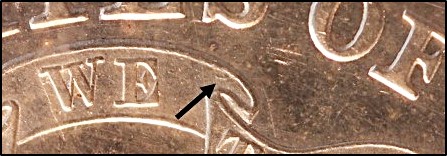 1871 Reverse PA die line in scroll 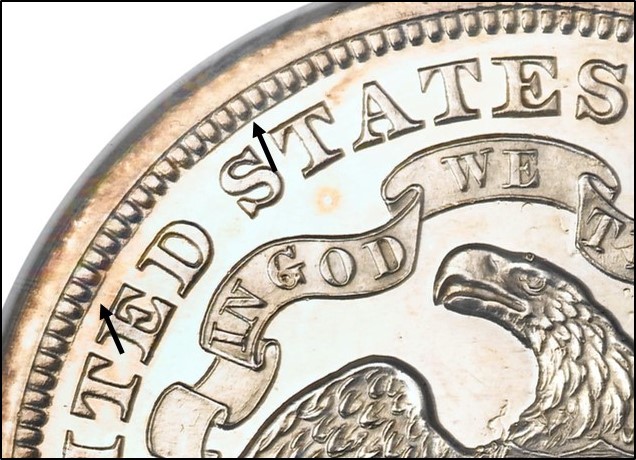 1871 Reverse PA scribe lines
|
| Photo credits:
Obverse P1 and Reverse PA: 1871 PCGS PR62, from the Osburn-Cushing reference collection. |