
|
|
Comments: This is the only use of Obverse 3 and the first of four uses of Reverse B. |
Obverse 3 The photo below shows the Obverse 3 attribution grid. 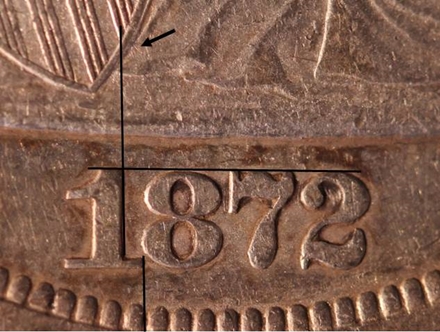 1872 Obverse 3 attribution grid Also in the photo is a tiny die line extending from the shield border at the base of vertical shield line 5-2. This can aid in confirming attribution, as can die lines under the heel, shown in the following photo. 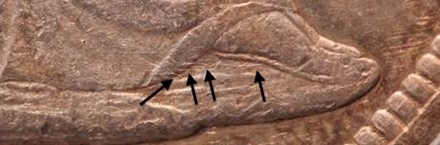 1872 Obverse 3 die lines under heel Note that the Obverse 3 date position is virtually identical to that of the much rarer Obverse 9. The only differences are the die lines under the heel that are present only on Obverse 3, and the lack of the die line in the denticles below the 8 seen on Obverse 9.
|
Reverse B shows one notable lump between the upright and the right serif of the first T in TRUST, probably caused by die rust. Several die lines around TR in TRUST can also be seen on most mid- to high-grade examples. These are shown in the following photo. 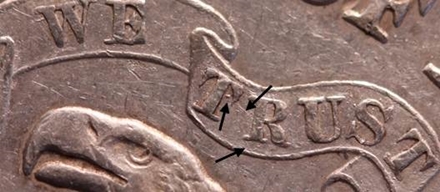 1872 Reverse B lump and die lines in motto
|
| Photo credits:
Obverse 3 and Reverse B: 1872 PCGS AU53, from the Osburn-Cushing reference collection. |